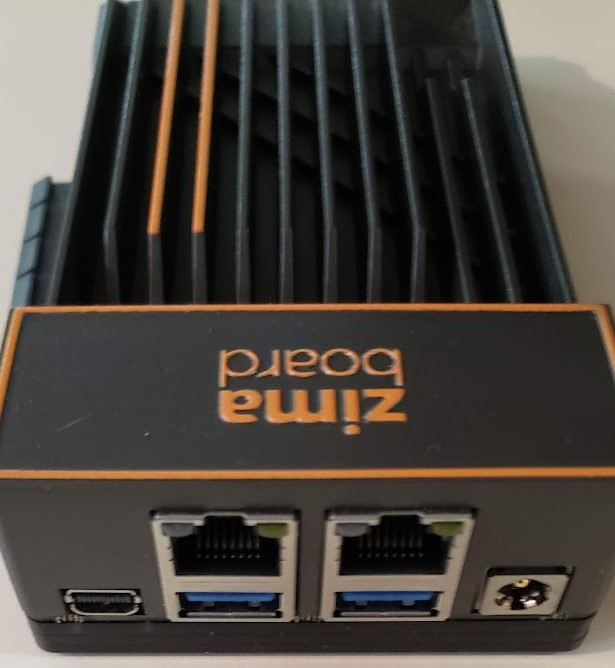
The ZimaBoard from IceWhale is a x86 hacker board that runs on an Intel Celeron N3350 Dual Core or an Intel Celeron N3450 Quad Core, depending on the model.
This guide will show how to setup a ZimaBoard to run pfSense.
pfSense, from Netgate, is a firewall application that is built on FreeBSD.
A firewall is a network security device that can be either physical hardware or software. It’s used to monitor all incoming traffic to protect the network based on security rules that are setup. It can route traffic, then, based on the rules, can allow/reject, or translate traffic in/out from a public ip to a private device behind the firewall. It can be used to assign internet protocol address’ (IP Address) using dynamic host configuration protocol ( dhcp ) to computer equipment.
pfSense is easy to install and use to use.
What is needed:
1) A monitor
2) A mini DisplayPort to DisplayPort cable, or mini DisplayPort adaptor to HDMI or DVI.
3) A keyboard
4) A flash drive at least 8 Gigs in size or greater
5) On another computer balenaEtcher installed ( Burning the image to the flash drive ), and with ethernet connection to finish the install.
6) A network cable
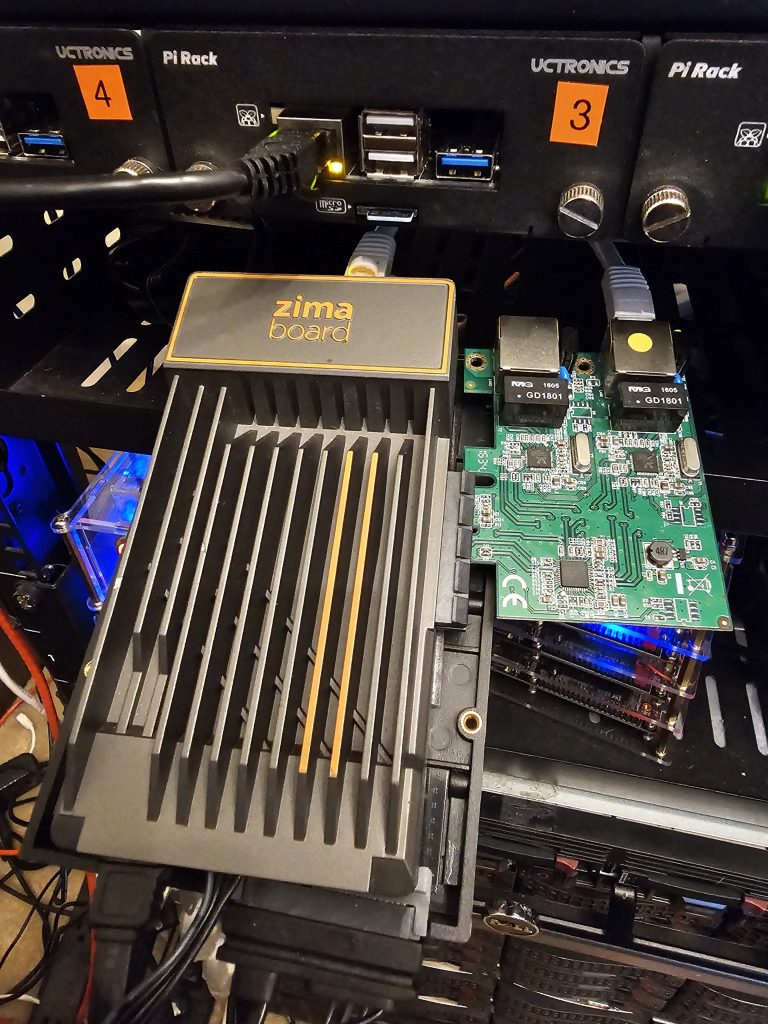
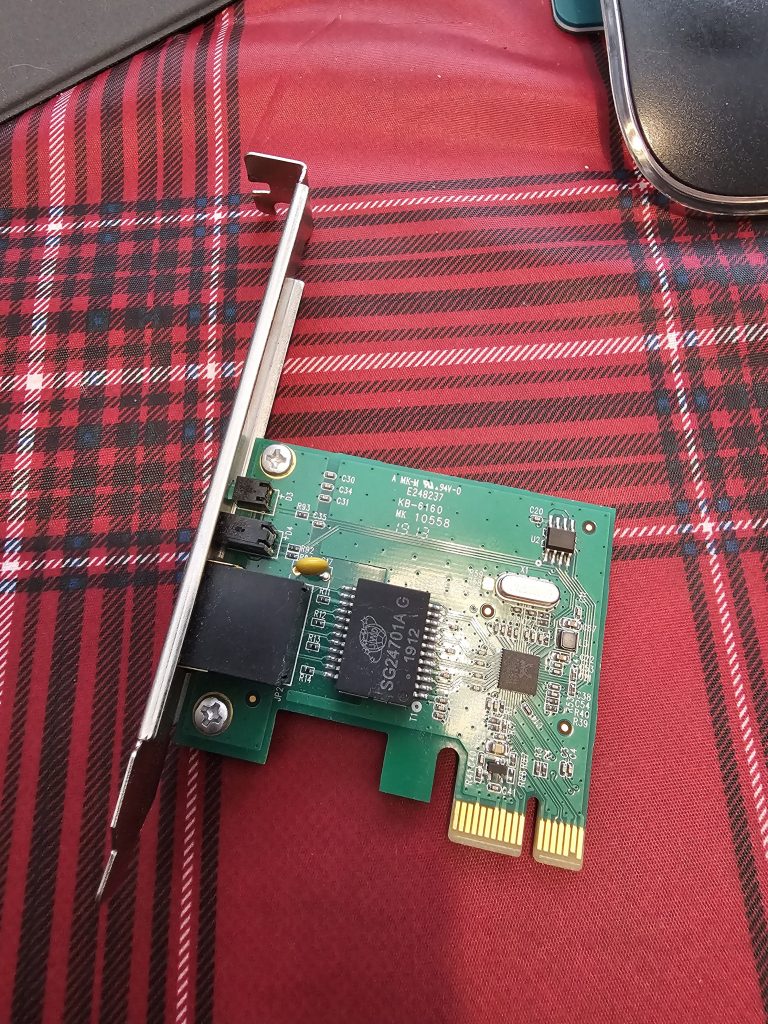
Recommend another USB Ethernet or PCI Ethernet Card like one of these

First a USB flash drive needs to be setup. Open a web browser and go to
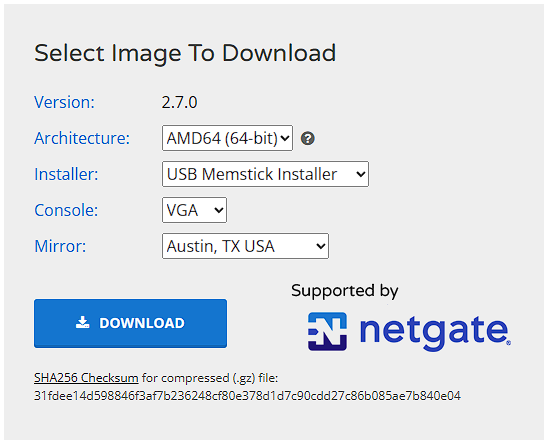
pfSense — Download
Select the following
* Architecure — AMD64 ( 64-Bit )
* Installer — USB Memstick Installer
* Console — VGA
* Mirror — Which is ever close to you and fast
It should look like this image, use it as an example
Use either 7Zip to decompress the gz, this helps then burning the image, that Etcher see img. The file can be decompressed by Etcher, but it seems that Ether tends not to fail if the file is uncompressed.
Now open Etcher and select the file. Make sure the flash drive is in, then press flash

When it is done flashing to the USB Flash drive, remove it from the PC and placed in the back of the ZimaBoard in one of the the USB ports.
In the other USB Port insert a keyboard, there’s no need for a mouse.
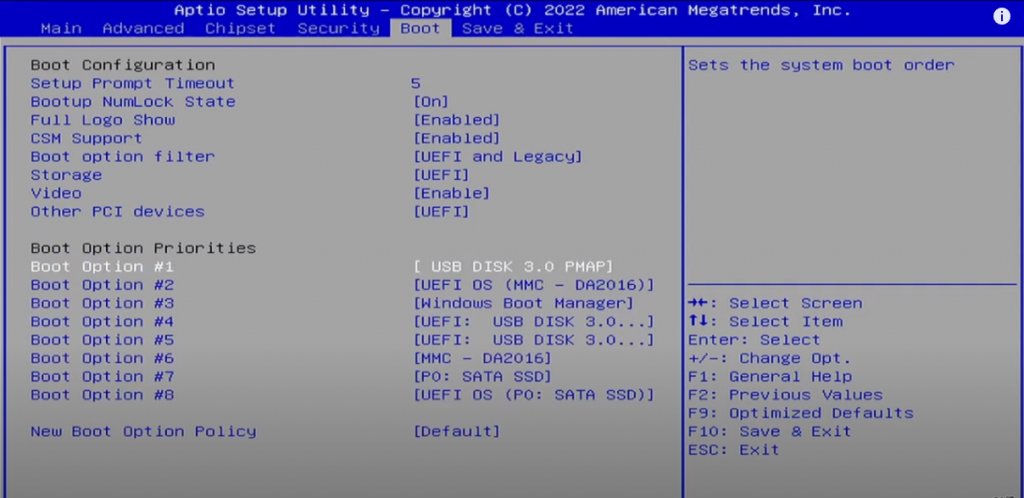
Plug in the power. When the ZimaBoard logo show on the the screen, press the “Delete” key to enter the BIOS, go to the Boot Tab. Go down to the “Boot Option #1” change it from the MMC – DA2016 to USB Disk 3.0 PMAP. Once set, press F10.
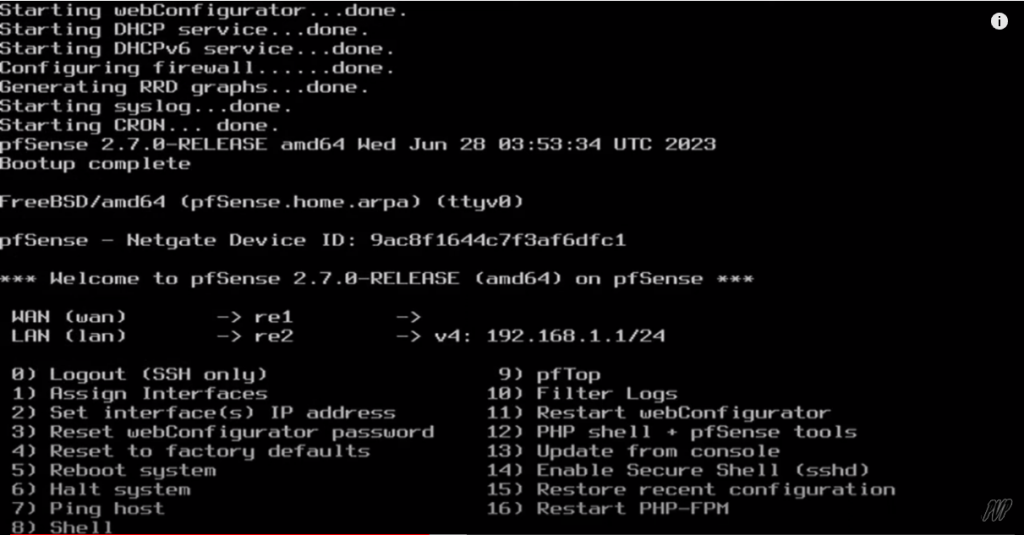
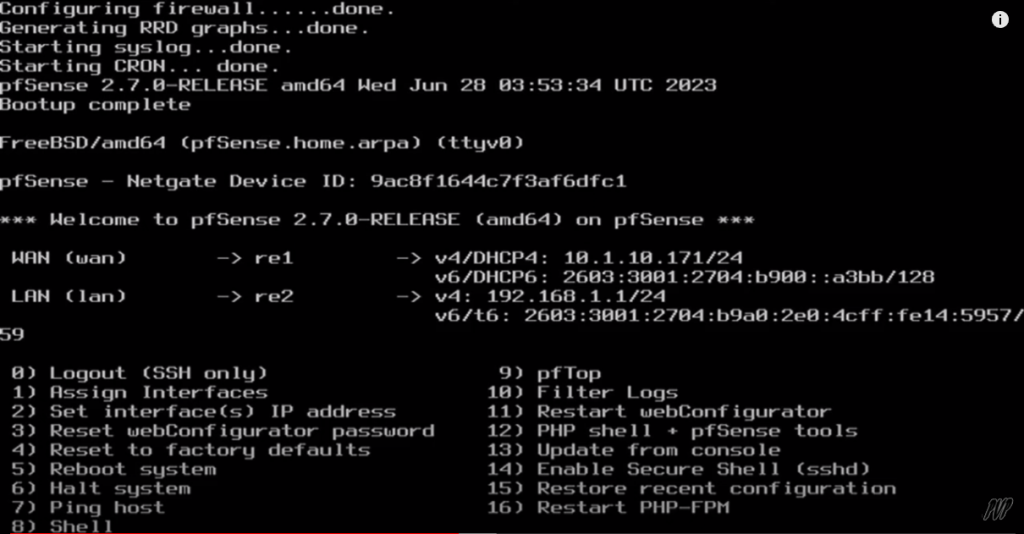
The board will reboot. The PF Sense menu will come up.
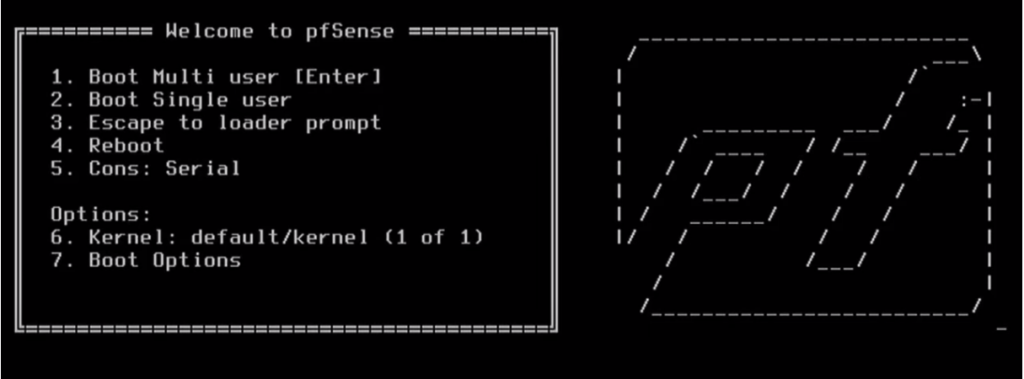
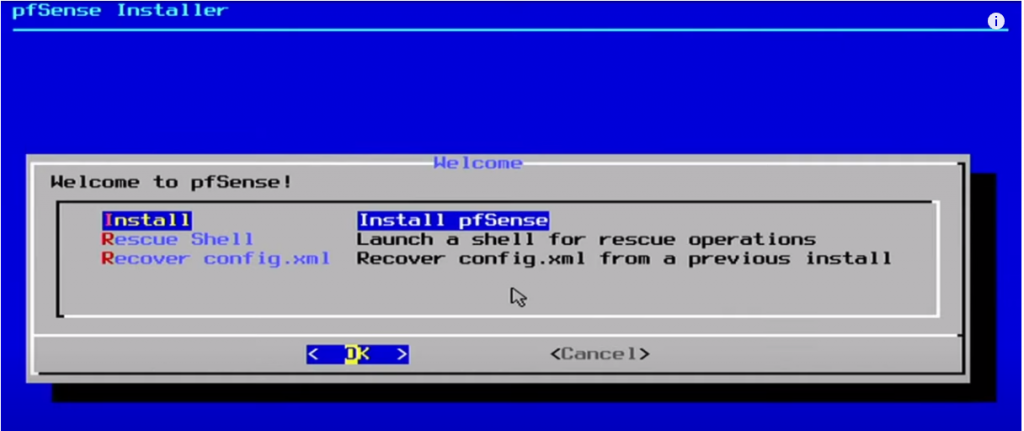
From this select, “1“. It will take the system a while to come up. The first screen to appear will be the end users agreement. Press “Enter” to accept. Now it’s time to start the install, next screen will be the “Welcome” screen. Press “Install” to start the install.
The next screen will be to set up the disk. Recommended to use the default stripe. Press the “Pool Type/Disks” to select disk. The eMMC for the Zimaboard is mmcsd0. Select it.
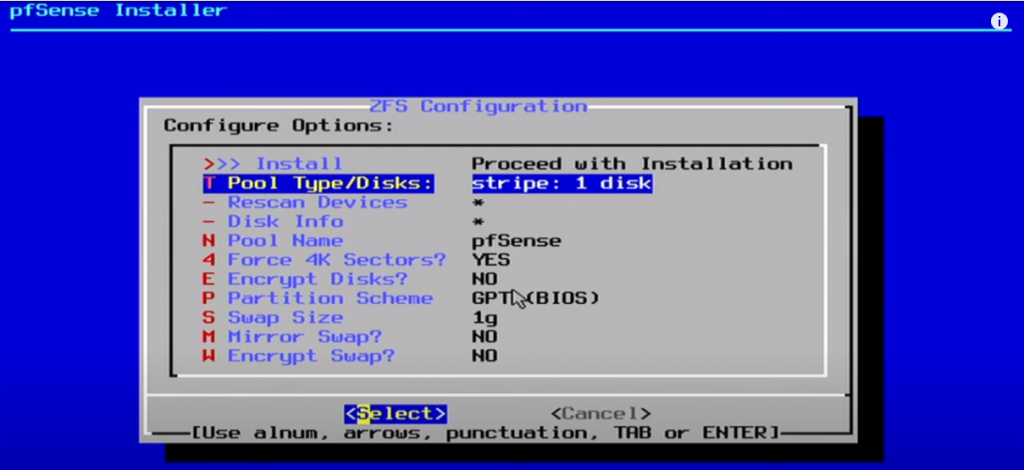
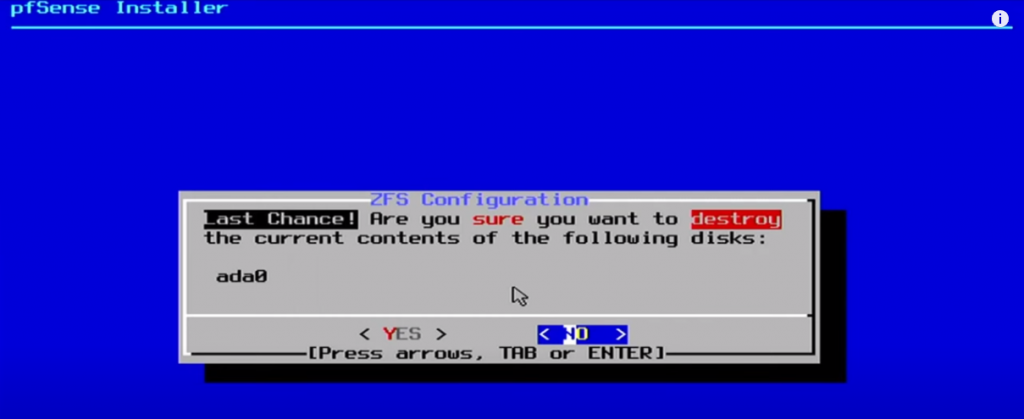
Use the arrows keys to move back up “>>> Install”, press “Enter“. The next screen will give a pop up warning and give a last chance before it installs pfSense. Use an arrow key to move to “YES” or press ALT-Y to start.
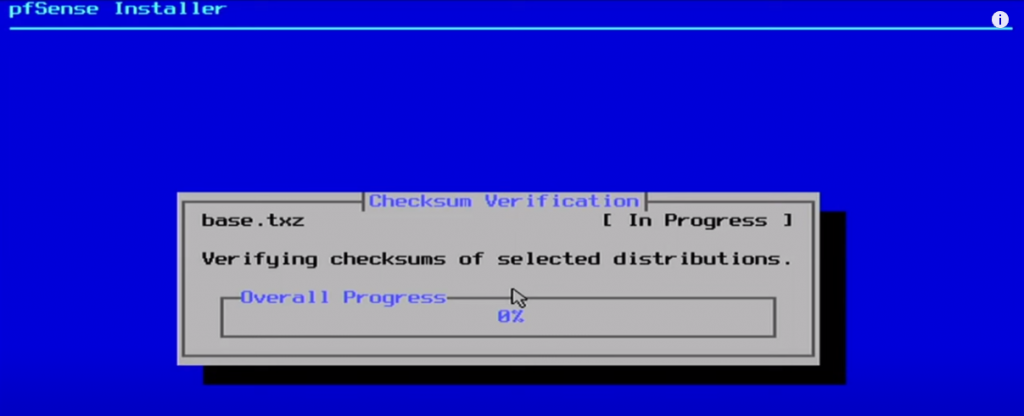
Now the install will start, so sit back and wait for it to finish. I
Once it’s done, reboot.

Remove the USB drive. Press the “Delete” key to go back into the “BIOS” and back to the “Boot” tab and change “Boot Option #1” back the MMC – DA2016 or to the drive you selected to install on. Press F10 to save. The board will reboot and boot into the pfSense.
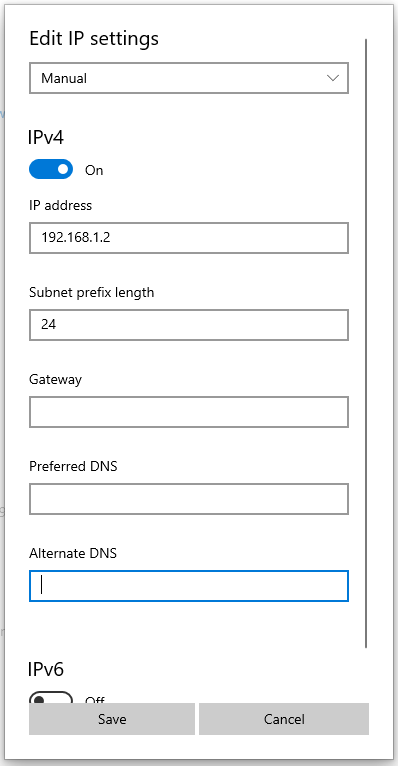
For the next part, a laptop or desktop will be needed, with an ethernet cable and ethernet jack or usb ethernet device. The laptop or desktop will need to be set to 192.168.1.2 with the netmask to /24 ( Note: This is the same as 255.255.255.0 )
The pfSense default ip is 192.168.1.1/24.
Plug in the cable from the Laptop/Desktop to left one that is closest the the PCI Express port. In the other port, plug into the back of the ISP Router. On the configuration above is because there is a PCI Express card with two ports. So this project has a total of four ethernet ports. The ports will be different, for the most part should look like this
| re0 | WAN |
| re1 | LAN |
The WAN port is setup to be on DHCP so it will grab the IP if the router is setup to issue one via DHCP. This can be changed later.
From the laptop/desktop open a browser in the address put http://192.168.1.1. A warning will come up for the connection it will say, “Your connection is not private“, click on “Advance“, then click on the bottom link to “Proceed to 192.168.1.1 (unsafe)“
The login is admin, with password pfsense. The admin password will need to be changed. The first few screens will be about Netgate support that can be purchased.
Screen 2 — General Information
1) Hostname
2) Domain
3) Primary DNS Server
4) Secondary DNS Server
Screen 3 — Time Server Information
- Enter in a time server or leave set to the default.
- Select a Time Zone, or keep at UTC.
Screen 4 — Configuring WAN
- Selected Type — This how the WAN connects to the router. If now sure leave it to DHCP.
- Mac Address — If the MAC address needs to be spoof, change it.
- MTU
- MSS
- IP Address — If 1 was selected to Static, place the address here.
- Subnet — The netmask need for the Static IP
- The Router Gateway
Here is an example:
IPv4 10.1.10.2 / 24
IPv4 Upstream gateway 10.1.10.1
Screen 5 — Configure LAN Interface
- LAN IP Address — Set the IP of the route or keep at 192.16.1.1
- Subnet Mask — Change it match IP range or keep it to /24 ( 255.255.255.0 )
Here is an example.
LAN IP Address: 192.168.107.1
Subnet Mask: /24
Screen 6 — Set Admin WebGUI Password
Change the password from pfsense to a new password.
Screen 7 — Reload Configure
This will take all the new changes and apply them.
Screen 8 — Reload in progress
The router is now in progress. Last screen, Screen 9 will state the Wizard is finish. Press “Finish“. The router will reboot on the new LAN IP if it was changed.
The ZimaBoard is now setup to run pfSense.
The last thing that might be needed with in pfSense is to update the Realtek Drivers. So far pfSense 2.7 seem to be running great. If the version is on 2.6 do the following
- If there is an old driver version e.g.:
pkg delete realtek-re-kmod-196.04 - then
fetch -v https://pkg.freebsd.org/FreeBSD:12:amd64/latest/All/realtek-re-kmod-198.00_1.pkg - then install the driver:
pkg install -f -y realtek-re-kmod-198.00.pkg - If not already present add the following configuration items to
/boot/loader.conf
if_re_load="YES"
if_re_name="/boot/modules/if_re.ko"- Reboot pfSense